athenaOne Dental (for FQHCs) — User Access, Settings, and Application Features
athenaOne Dental is only available for FQHCs on athenaOne.
This topic describes athenaOne Dental information related to logging in, the page header, user profiles, and role-based access.
Use these instructions to learn more about creating a case and how to route it to the appropriate team.
-
Log into athenaOne.
-
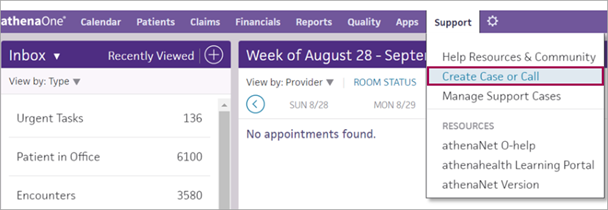
Click Support.
-
Click Create Case or Call.
-
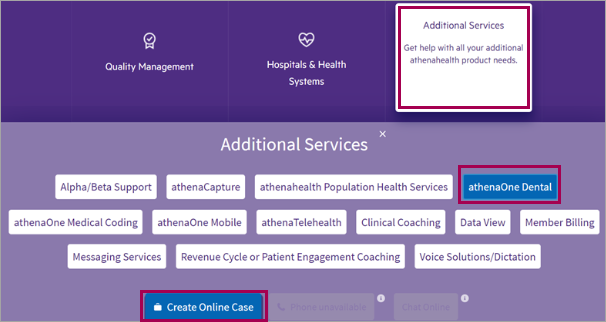
Click Additional Services.
-
Click athenaOne Dental.
-
Click Create Online Case.
-
Complete the appropriate fields.
Tip: Please keep in mind a detailed description with patient IDs and screenshots will help expedite troubleshooting).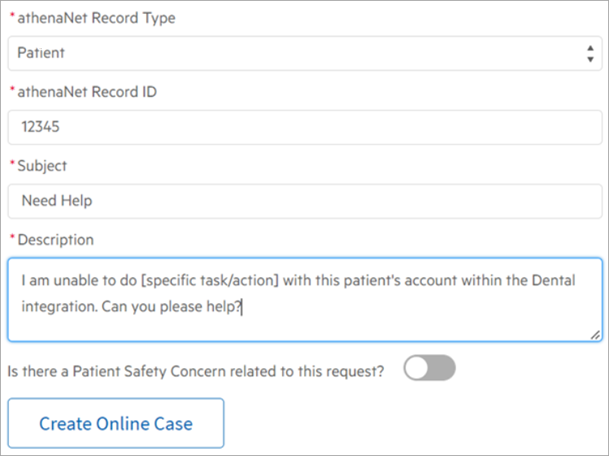
-
Click Create Online Case.
Login
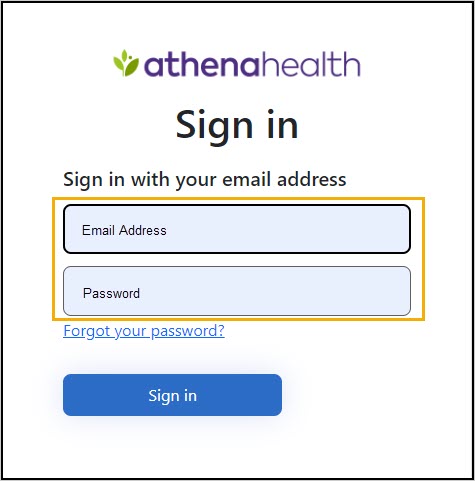
athenaOne Dental is a single sign-on, easy-to-use access page. To log in to athenaOne Dental:
-
Navigate to the athenaOne Dental login page.
-
Enter your login credentials (email address and password) in the appropriate fields.
-
Click Sign in.
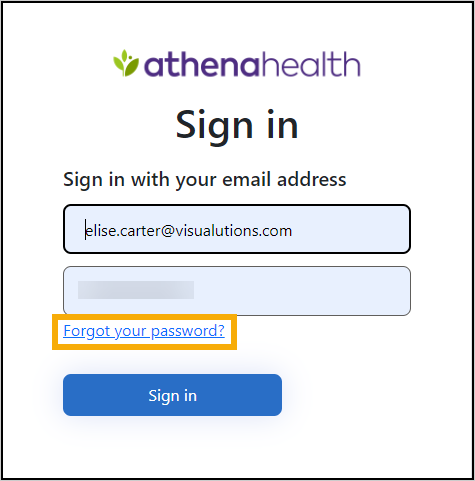
To reset your password:
If a password is forgotten, use the following steps to reset it.
-
Navigate to the athenaOne Dental login page.
-
Click the Forgot your password? hyperlink.
-
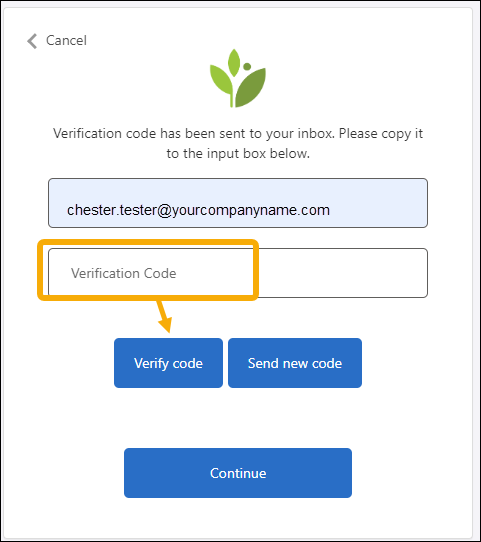
Enter the Email address and click Send verification code.
-
The system emails a verification code. Enter the Verification Code from the email and click Verify code.
-
Click Continue and follow the prompts to enter a new password and confirm it.
-
Click Save.
Page Header
The top right of the athenaOne Dental page header contains the Application Module and the User Profile icons. Use these icons to access the Application Module functionality and User Profile options.
Application Modules

User Profile Icon

Refer to Application Modules for more information on Application Module functionality. Refer to User Profile for more information on user profile options.
Application Features
Some features inside the athenaOne Dental application can be found in many or all the application modules. The following sections describe the available features and their purposes.
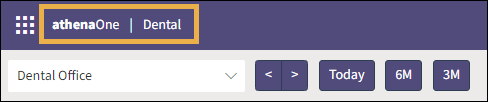
Application Refresh
The ability to refresh a page within the application is accessible from the athenaOne | Dental menu bar. Click the athenaOne | Dental button to do a page refresh.
Bento Box and Administrative Applications
The Bento Box or waffle-shaped icon allows the Senior System Applications Administrator (SSAA) Role access to administrative applications where they can create and maintain the practices users and subscriptions.

Currently, the Bento Box connects to the Membership Application for User Management.
Membership and SSAA Role
The athenaOne Membership allows practices to manage users and subscriptions. The Senior System Applications Administrator (SSAA) maintains the user roles and controls the permissions given to individual users. The practice’s SSAA can add, edit, and deactivate users through the Bento Box access to Membership.
Refer to Role-Based Access and Senior System Applications Administrator for additional role information.
To access Membership:
-
Log in to Dental.
-
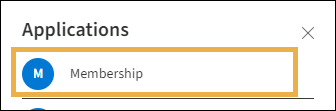
Click the Bento box (waffle button) on the Dental header bar.
-
Click Membership from the Applications navigation menu.
Note: If a non-SSAA user selects Membership, they will receive an “Unauthorized User” message.
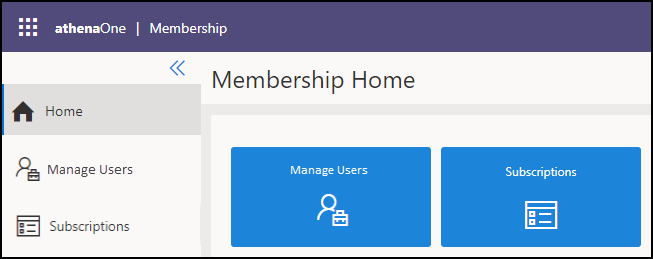
- The Membership Home Page opens in a new tab containing navigation options for Manage Users andSubscriptions.
Manage Users
The Manage Users allows a practice’s SSAA to add, edit, or deactivate individual users. Once created in Manage Users, the SSAA user will navigate to the Subscriptions and assign the appropriate role(s) the user will need to access to complete their job responsibilities.
For professional users (providers, hygienists, etc.), the SSAA creates the new user in Manage Users to associate the professional suffix and then assigns and maps the user’s role(s) in Subscriptions. For non-professional user roles, the SSAA can create a new user and assign the new user role from within Subscriptions.
Important:
-
If a user forgets their password, use the Forgot your Password option from the login screen. Refer to Login for more details.
-
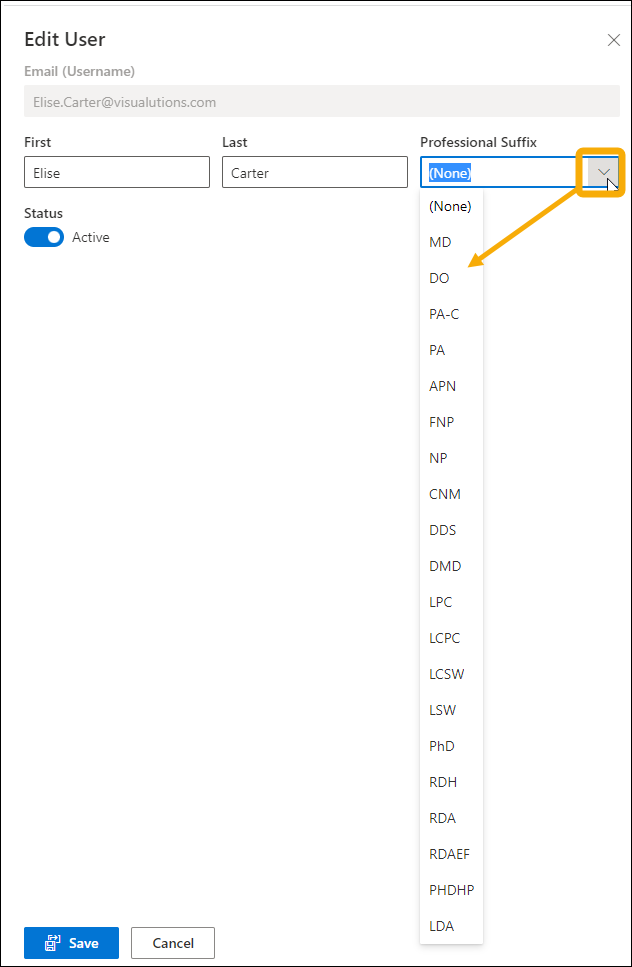
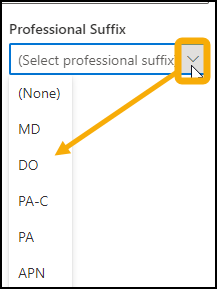
The Professional Suffix associated in Manage Users is the suffix that appears in athenaOne Dental for users with a clinical role as they sign, attest, or amend clinical notes.
Add Users
-
Navigate to the Membership Home Page.
-
Click Manage Users.
-
Use the Search Users textbox and enter the person’s name to verify that the user does not already exist.
Note: This step is to prevent duplicate user entries. The SSAA user may skip this step if the user to be created is new to the practice.

-
Click +Create User.

-
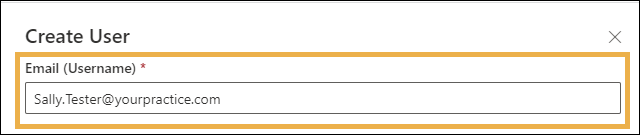
Enter the individual’s email address at your practice (Required).
Important:Confirm the email address is correct. Once the user is saved, this cannot be changed in editing.
-
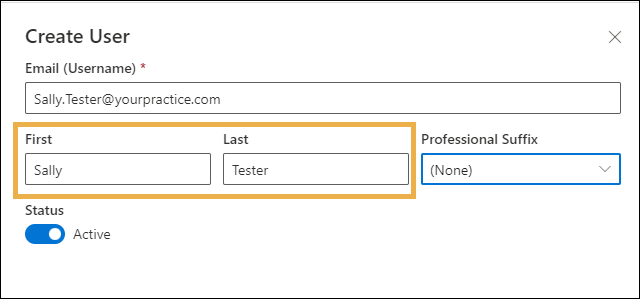
Enter the individual's First name and Last name.
-
Use the drop-down arrow to select the Professional Suffix (if applicable).
- Click Save.
Important:Once saved, the SSAA user should navigate to Subscriptions to assign the new user’srole permissions, as these do not automatically assign.
Edit Users
The Edit Users allows the practice’s Senior System Applications Administrator to modify a user’s First Name, Last Name, and Professional Suffix.
-
Navigate to the Membership Home Page.
-
Click Manage Users.
-
Enter the user’s name in the Search Users textbox and locate the user.
-
Click the name or the email hyperlinks to edit the user.
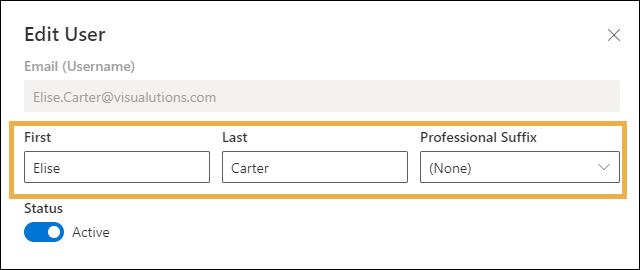
- The Edit User window opens. Update the First Name, Last Name, or Professional Suffix.
Important:The email address field is not editable. The user would need to be unmapped (if needed), deactivated, and then re-added as a new user.
-
Click Save to save changes or Cancel to exit.
Deactivate Users
The Edit user window allows the SSAA user to deactivate or remove a user who leaves and is no longer with the practice.
Important Note: If the user needing to be deactivated is a mapped provider, do not unmap the provider.
To view any already deactivated or disabled users:
Note: Printing a list of active or inactive users is not available. Use the steps below to view the list from athenaOne Membership.
-
Navigate to the Membership Home Page.
-
Click Manage Users.
- Click the Active Only toggle off.

-
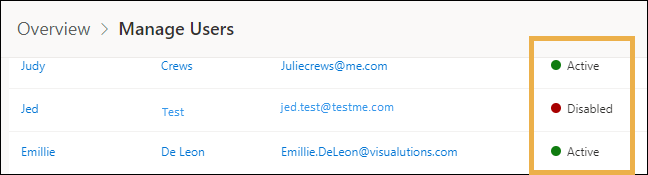
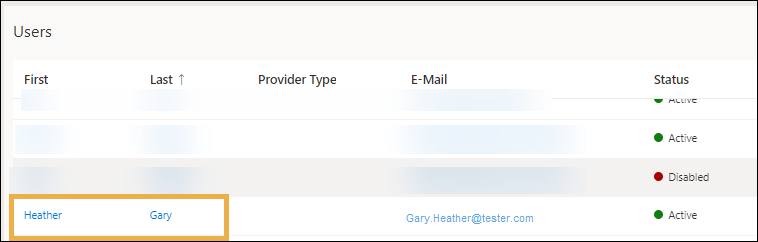
The list of users will now show active and disabled users.
- Active Users display with a green dot.
- Disabled Users display with a red dot.
To deactivate a user:
-
Navigate to the Membership Home Page.
-
Click Manage Users.
-
Enter the user’s name in the Search Users textbox and locate the user.
-
Click the name or the email hyperlinks to edit the user.
- The Edit User window opens.
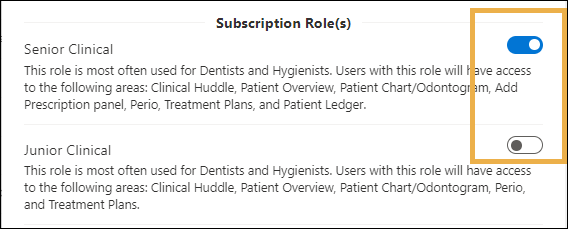
- Click the toggle to deselect the user’s Subscription Role(s).
-
Next, click the Active toggle to the off position to deactivate or disable the user.

-
Click Save to save changes or Cancel to exit.
Subscriptions
Subscriptions enable the SSAA user to create a user, assign individual users their necessary role(s), and allows for mapping Providers.
For non-professional user roles, the SSAA can create a new user and assign their role(s) from within Subscriptions. For professional users (providers, hygienists, etc.), the SSAA creates the new user in Manage Users to associate the professional suffix and then assigns and maps the user’s role(s) in Subscriptions.
Add User
Subscriptions allows the SSAA to create a user like Manage Users.
To add a user:
-
Navigate to the Membership Home Page.
-
Click Subscriptions.
-
From the Dental tab, use the Search Users textbox and enter the person’s name to verify that the user does not already exist.
Note: This step is to prevent duplicate user entries. The SSAA user may skip this step if the user to be created is new to the practice.

-
Click +Add User.

-
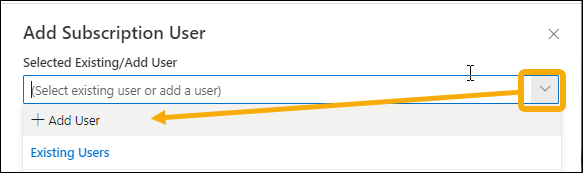
The Add Subscription window opens.
- Click the drop-down arrow and click +Add User.
-
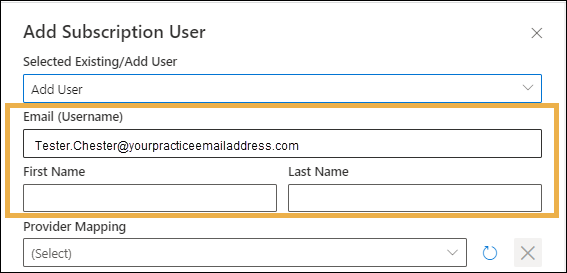
Enter the following user information:
-
Email: The user’s email address with your practice.
Important: Confirm that the email address entered is correct. Once saved, this cannot be changed or edited.
-
First Name: The user’s First Name.
- Last Name: The user’s Last Name.
-
-
Click the drop-down arrow to map the provider from athenaOne.
Notes:
- Use Provider Mapping for provider user roles.
- The drop-down list only lists the available providers to map to the Dental Subscription.

-
Use the Refresh Button to refresh the Provider list in the drop-down menu.
For example, use Refresh for a new provider just created in athenaOne, as this pulls over the new provider data to select from the drop-down menu. Note: This may take a few minutes.

-
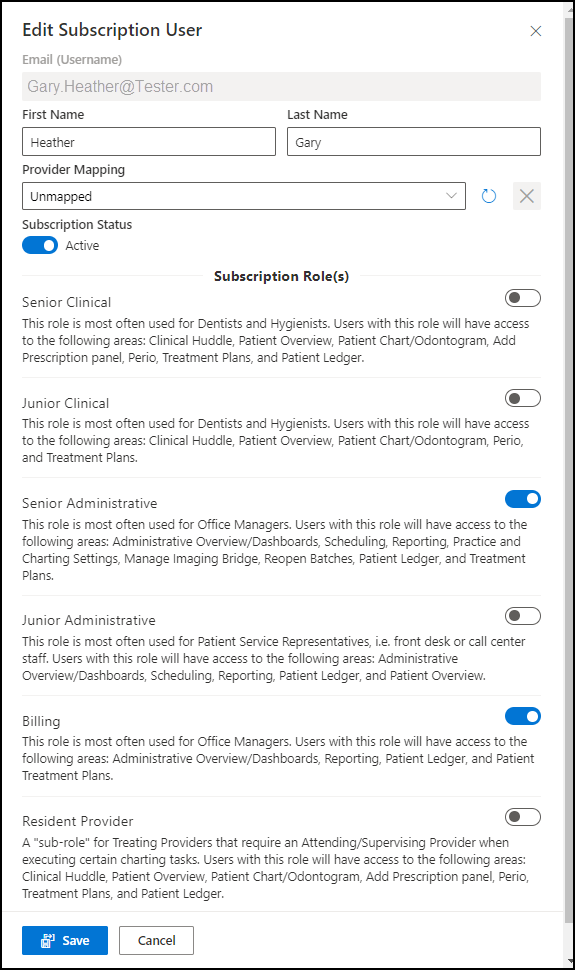
Click the toggle next to the Role corresponding to this user’s position or job duties.
Refer to Role-Based Users and User-Roles for information regarding what may apply to your user. The below example is for an office manager:
-
Click Save.
The user will now have access to the applicable areas in athenaOne Dental based on their role(s).
Assign User Roles
The SSAA can edit a user’s role to increase or decrease access to areas within athenaOne Dental.
Important Notes:
-
User roles relate to the type of user and their position or job duties at the practice.
-
Permissions are areas within athenaOne Dental that can be accessed when the user is assigned the corresponding Role associated with them.
Refer to Role-Based Access for details on the areas the user roles can access.
-
Junior Clinical: often assigned to Dental Assistants.
- Senior Clinical: often assigned to Dentists and Hygienists.
- Resident Provider: often assigned to treating providers that require an Attending Provider when executing specific charting tasks. Important
Note: Resident providers cannot attest clinical notes. -
Senior Admin: often used for Office Managers.
- Junior Admin: often assigned to Patient Service Representatives, e.g., front desk or call center staff.
- Billing: often assigned to the revenue cycle team.
To assign or edit user roles for an existing user:
- Navigate to the Membership Home Page.
-
Click Subscriptions.
- Click Dental.
- Use the toggles to filter the list of users (Optional).
- Active Only — Click the toggle to show only active users.
- Provider Only— Click the toggle to display only the practice’s providers.

-
Enter the user’s name in the Search Users textbox (Optional).
- Locate the user from the list and click the user’s name hyperlink.
-
Click the toggle next to the Role corresponding to this user’s position or job duties.
The below example is for an office manager:
-
Click Save.
The user can now access the applicable areas in athenaOne Dental based on the added/edited role(s).
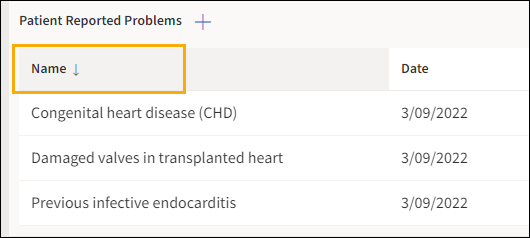
Information Tables
Any information tables found in the athenaOne Dental application modules can be sorted by selecting the column headers.
-
An arrow will appear by the column header once sorted.
- The up/down orientation of the arrow indicates the direction of the sorting.
- To change the direction of sorting, click on the currently selected column header.
Text Formatting Toolbar
Many application modules allow editing in text fields. If available for a field, a text formatting toolbar will appear to enable text formattings such as bold, italics, underlining, bulleted list, alignment, heading options, and a clear formatting button.

Note: The clear formatting button allows users to customize copied and pasted text in the text fields. The Clear Formatting button is available in the following places:
-
Settings > Procedure Templates
-
Charting > Clinical Note
-
Charting > Note Browser
-
Charting > Patient Notes
-
Patient Profile > Communication
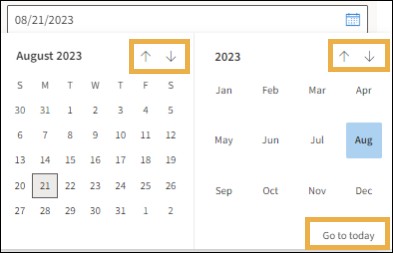
Calendar Icon
The calendar icon allows users to quickly select a date by using a calendar. To use the calendar icon:
-
Click the calendar icon to open the calendar.

- Select a date by using the following tools:
- Up/Down Arrows: Located at the top to switch through months or years.
- Go To Today: Automatically selects the current date.
- Date Selection: Click on a date to select it from the calendar.
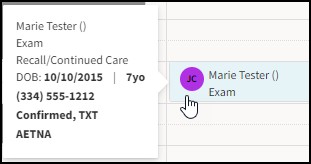
Hover Panel
The Hover panel lets users see a summarized view of the patient’s demographics, including the primary payer/insurance. The panel appears as the cursor hovers over the patient.
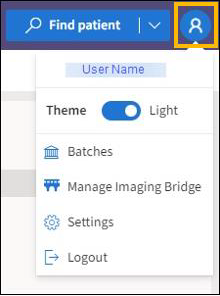
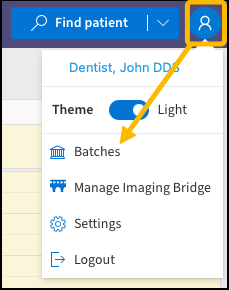
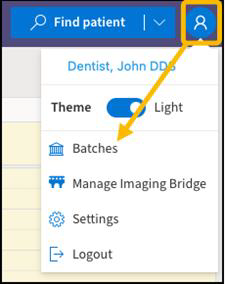
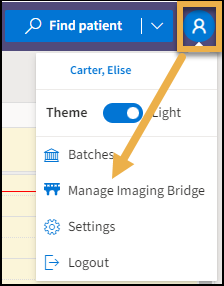
User Profile
Click the User Profile icon to display a drop-down menu containing the following:
-
Current User Name (Read Only)
-
Theme
-
Batches
-
Managing Imaging Bridge
-
Settings
-
Logout
Quick Tip: Use the Theme toggle to switch between light and dark modes.
Manage Batches
In Manage Batches, the user can create a new batch, select an existing batch, close a batch, reopen a batch, and print a batch. In addition, batches store the user’s payment posting details.
Note: Users will see only batches created in athenaOne Dental.
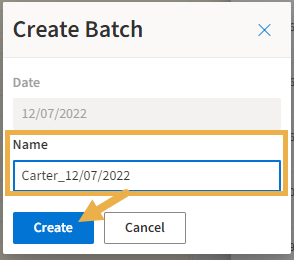
Creating Batches
To create a new batch:
- From the User Profile menu, click Batches.
-
Select the + Create Batch button.

-
Enter the batch name in the Name field.
- Click Create.
Using Batches
To use an existing batch:
- From the User Profile menu, click Batches.
-
Locate the batch by entering the batch name or date in the Filter batches field.

-
Once located, click the More Options three dots in the Actions column for the batch.
- Select the Use batch option.
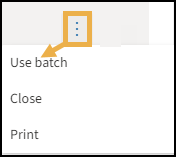
-
The batch Name hyperlink updates with the selected batch.

Changing the Batch Name
To rename an existing batch:
-
From the User Profile menu, click Batches.
-
Locate the batch by entering the batch name or date in the Filter batches field.
-
Click the batch Name hyperlink.
-
The Update Batch panel opens. Edit the Name as needed.
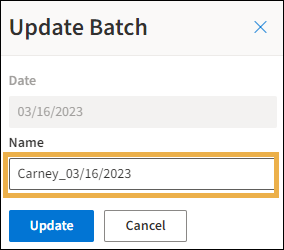
-
Click Update to save or Cancel to exit.
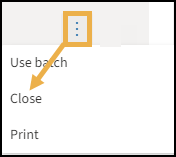
Closing Batches
To close an existing batch:
- From the User Profile menu, click Batches.
-
Locate the batch by entering the batch name or date in the Filter batches field.
Quick Tip: To view a previously closed batch, turn the toggle switch off for Active Only batches.
-
Once located, click the More Options three dots in the Actions column for the batch.
-
Select Close to no longer post within the batch.
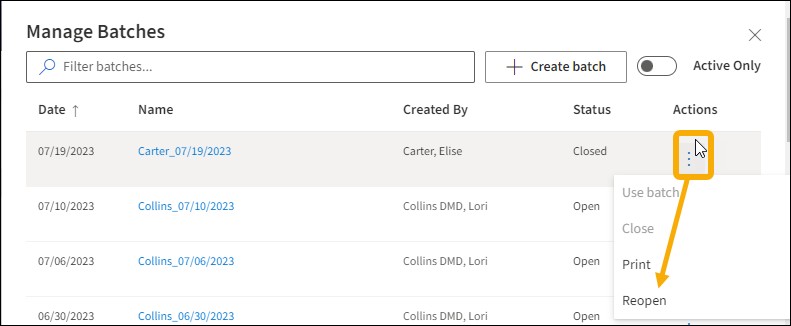
Important Note: Users can Reopen a closed batch. From the More Actions menu for the batch, click Reopen.
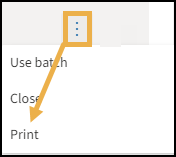
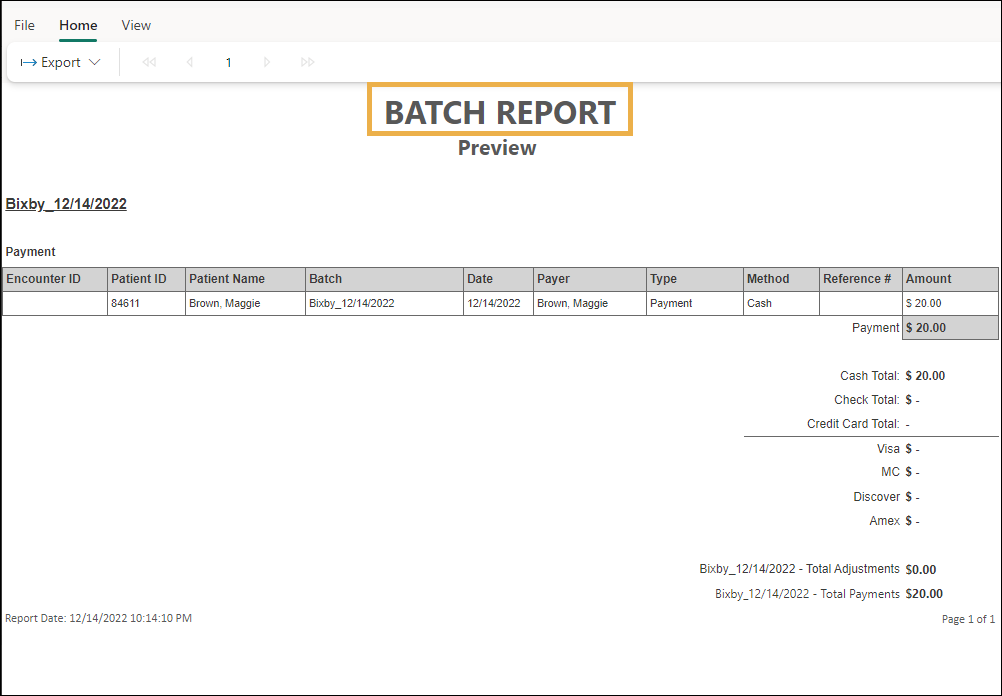
Printing a Batch
Important Note: Any batches originating in the billing system cannot be selected; however, the batch report can still be printed for these batches.
To print a specific batch:
- From the User Profile menu, click Batches.
-
Locate the batch by entering the batch name or date in the Filter batches field.
-
Once located, click the More Options three dots in the Actions column for the batch.
- Click the Print option.
-
The Batch Report opens in a Report Preview window. Refer to Report Preview Features for more details.
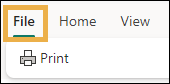
-
Click the File tab and select Print.
-
Adjust page print settings, if necessary, and click Print.
- Click the X to close.
Manage Imaging Bridge
Within athenaOne Dental, the user has access to the imaging software. The imaging bridge software connects athenaOne Dental to the imaging software and must be downloaded on every client machine required to access the imaging software.
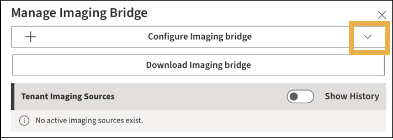
To access the imaging bridge:
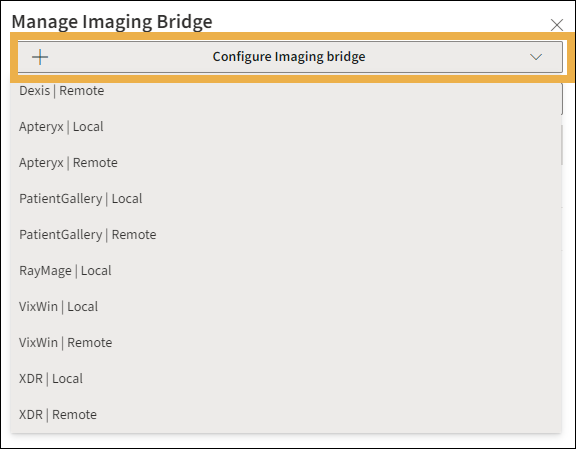
- Click Manage Imaging Bridge in the User Profile drop-down menu.
-
This opens the Manage Imaging Bridge window. Next, click the drop-down arrow in Configure Imaging Bridge.
-
Select the Imaging Bridge for your site from the drop-down menu.
-
Consult with your IT department on completing the fields inside Create Imaging Source.
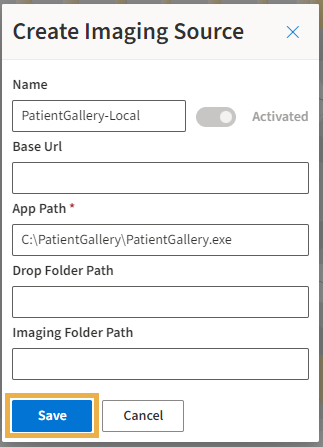
-
Once the fields are complete, click Save.
- Click Download Imaging Bridge to download the imaging bridge software. The file downloads in a zip package format.
Important Note – The Imaging Bridge must be installed on each workstation that views and captures images.
Settings
Settings allow users to manage settings for the Practice and Charting modules.
To locate Settings:
- Click the User Profile image in athenaOne Dental.
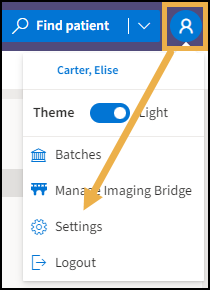
-
From the menu list, click Settings, and an expanded window opens.
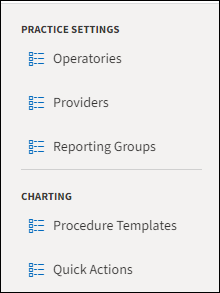
- Select the desired module setting to edit: Operatories, Providers, Reporting Groups, Procedure Templates, or Quick Actions.
-
Upon completing changes, click the Close or the keyboard [ESC] button.
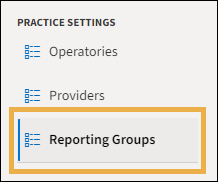
Practice Settings
Practice Settings allow users to manage settings for the Operatories, Providers, and Reporting Groups.
Manage Operatories
The Manage Operatories section allows users to add and edit existing operatories. In the Practice Settings window, click Operatories to view the Manage Operatories section.
-
Click Create Operatory to add a new operatory.

-
Enter the Name (required) and use the drop-down menu to select the Location of Care (required).
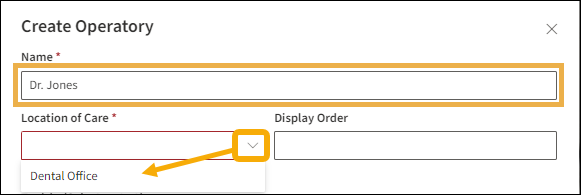
-
Enter the Display Order (optional).
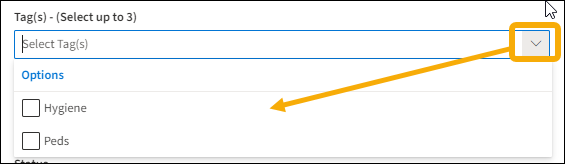
- Use the drop-down menu to select the viewing Tags or create a new one by typing the desired name for the viewing Tag.
Important Notes:
- Users can select up to three (3) Tags per Operatory.
- The Tags display as “Views” in the scheduler.
- Users can assign the same Tag in different Locations of Care. However, when in the Scheduler and selecting a Tag to view, it only shows the Tag for that specific Schedule location.
Tags do not affect the scheduled hours or the days set in the Operatory.
-
Enter a brief Description in the textbox (optional).

-
By default, the Status is set to Active.
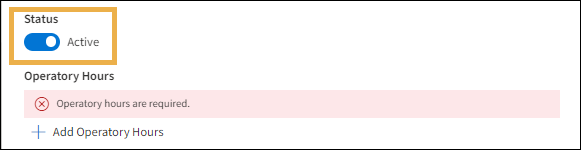
-
Click the + next to Add Operatory Hours to input hours.

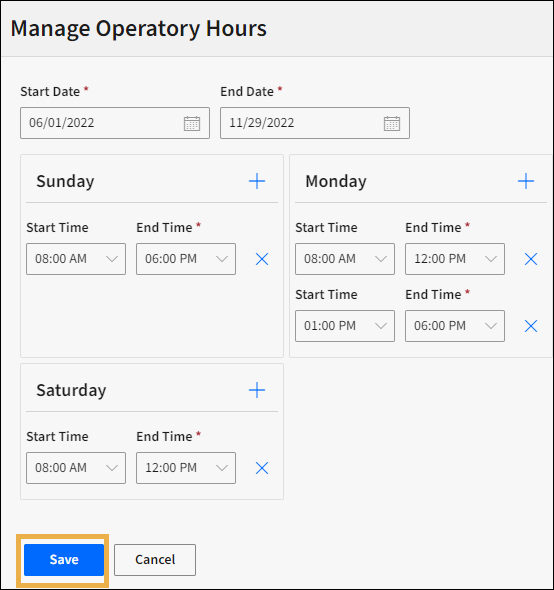
Manage Operatory Hours
-
Enter the Start and End Dates or use the calendar icon to select the dates (Required).

-
Click the + next to the days of the week to add to the schedule.
- Use the drop-down arrows to select a Start and End Time for each selected day.

-
Click Save or Cancel to exit.
Editing Operatories
-
Use the Search textbox and enter the Operatory name to locate.

Tip: Use the Active Only toggle to remove the deactivated Operatories from the viewing list.
-
Click the Name hyperlink for the operatory.
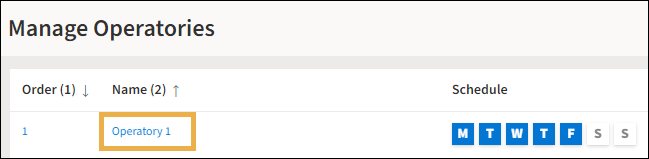
- The Edit Operatory window opens. Edit the operatory information as needed.
Note: The toggle to inactivate an operatory is in the Status section.
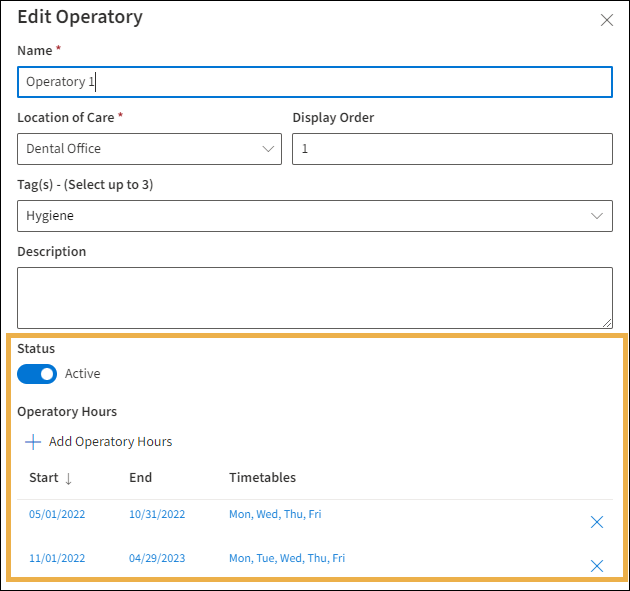
-
Click Save or Cancel to exit.
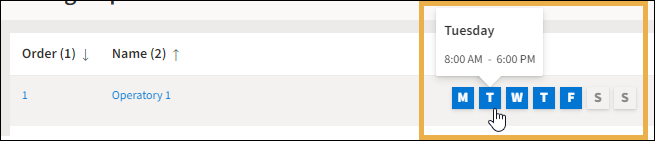
Quick Tip: To view operating hours for the operatory, hover over the days of the week. Scheduled days display in blue and unscheduled days show in white.
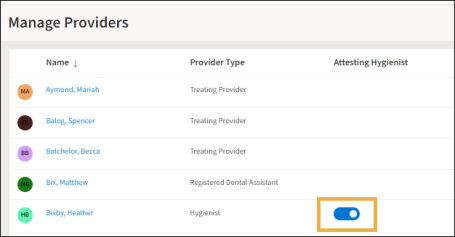
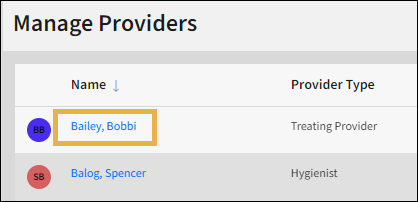
Manage Providers
Click Providers to view the Manage Providers section. Users with a Senior Administrative Role can add and edit existing providers. Refer to Role-Based Access for additional information on user roles.
From Settings, click Providers to view the Manage Providers section.
A provider may be one of the following:
- Treating Provider
-
Treating Provider (Resident)
-
Hygienist
- Registered Dental Assistant
Important Note:
-
Providers must have a valid athenaOne® username/email address.
-
If the Hygienist needs to view their schedule in athenaOne® and/or they can bill, the SSAA user must assign the Provider Type as ‘Treating Provider (Resident).’
-
Treating Provider and Resident provider types must be mapped in Membership.

-
The Attesting Hygienist toggle must be enabled for Hygienists who attest Clinical Notes. Exception: See Important Note number two (above).
Creating Providers
-
Click Create Provider to add a new provider.

-
Select the provider using the drop-down arrow.
Note: Only mapped and “Active” status providers in Membership will display.

-
Fill in the Name and Provider Type fields (Required).
Note: The Provider Type drop-down will display options based on the mapping status of the user in membership.
-
Unmapped users — Hygienist or Registered Dental Assistant options.
-
Mapped users — Treating Provider, Treating Provider (Resident), and Hygienist options.
-

-
Select a color to associate with the provider.
-
Attesting Hygienist option:
-
If a hygienist will be attesting clinical notes, click the toggle to activate.
-
If the hygienist will not be attesting notes, deactivate the toggle.
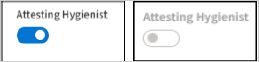
Important: The Provider Type enables the Attesting Hygienist toggle. The Attesting Hygienist default setting for an athenaOne mapped hygienist is enabled.
-
- Add provider hours by selecting the + next to Add Provider Hours.
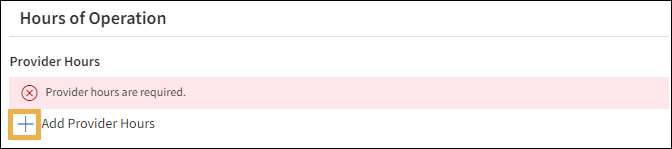
Refer to Manage Provider Hours for details (see below). -
After adding the hours, click Save.
-
Enter the Start and End Dates.

-
Click the + next to Add Location of care to select the Location of Care.
- Repeat this step to add additional Locations of Care.
- Click the + next to the days of the week to add it to the schedule.
- Use the down arrows to select Start and End Times for each day.

-
Click Save or Cancel to discard.
Editing Providers
- Click the Name hyperlink.
The Edit Provider window opens.
-
Update the Provider Type or Provider Color if needed.

-
Attesting Hygienist toggle:
- If a hygienist will be attesting clinical notes, click the toggle to activate.
- If the hygienist will not be attesting notes, deactivate the toggle.

Important: The Attesting Hygienist default setting for an athenaOne mapped hygienist is enabled or toggled on.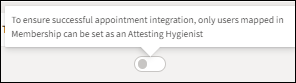
-
Update the Provider Hours if needed.
-
Once finished, click Save or Cancel to exit.
The Reporting Groups allow the practice to create categories for reporting purposes. Users can rename the templated groups, add categories, and add sub-items within each category to better fit the organization’s needs.
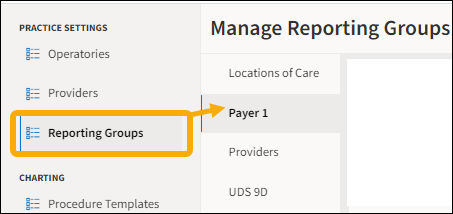
Users maintain the following reporting groups:
-
Locations of Care: Users can create sub-category groupings for the organization’s service locations. For example, create a sub-category for all Pediatric office locations or School-Based Health locations. See Adding a Sub-Category for details.
-
Payer 1 Groups: Users can create categories with sub-category groups about specific insurance payers. For example, if your practice needs insurance payer grouping, leave the Payer 1 display name as is and add/update the sub-categories with the payers needed. See Adding a Sub-Category and Editing a Sub- Category for more information.
-
Provider Groups: Users can create sub-category groupings for reporting on providers.
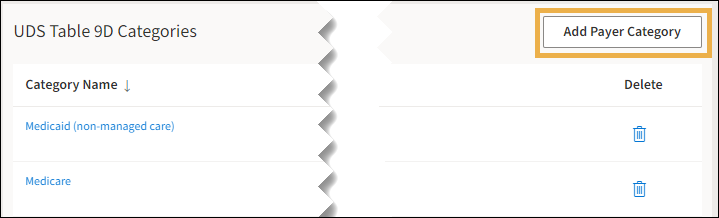
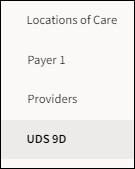
For example, create a sub-category for all Pediatric dentists or a sub-category for Hygienists. See Adding a Sub-Category for more information. - UDS 9D Group: Users can maintain the sub-categorized payers associated with the practice’s UDS 9Dreporting. Review, add, or remove payers from the list as needed.
For example, a specific Fee For Service Medicaid payer is no longer a part of your practice’s UDS 9D reporting group and needs removing from the list. See Removing a Sub-Category for more details.
To access Reporting Groups:
- FromUserProfile,clickSettings.
- Under Practice Settings, click Reporting Groups.
The Reporting Groups allow the practice to customize the category Display Name, create sub-categories, edit sub-categories, and remove sub-categories based on the reporting needs of the practice.
Editing the Display Name:
Users can edit the Display Name of a reporting group for their organizational needs.
For example, change the Display Name of the Payer 1 group to Financial Class and add sub-categories to run reports on this Financial Class group. Or, if your practice needs insurance payer grouping, leave the Payer 1 display name as is and update the sub-categories with the payers needed. See Adding a Sub-Category for more information.
To customize a report group Display Name:
-
From Reporting Groups, click the Payer 1 Group.
-
Click the Display Name textbox and edit the name.

-
Click the Description field and enter a brief description.

-
Click Save.
Users can add sub-categories to the Reporting Groups. The steps to add a sub-category for the different types of reporting groups vary slightly.
Important Note: Users can create multiple sub-categories.
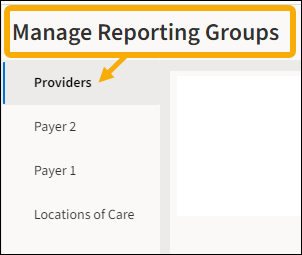
To add a Locations of Care sub-category:
- From Manage Reporting Groups, click Locations of Care.
-
Click Add Location of Care Category.

-
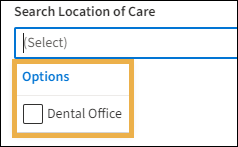
The Manage Location of Care window opens. Enter a Category Name.

-
Click the Search Location of Care drop-down arrow.

-
Use the drop-down menu and click the checkbox(es) for the desired location(s).
-
Click Save or Cancel to exit.
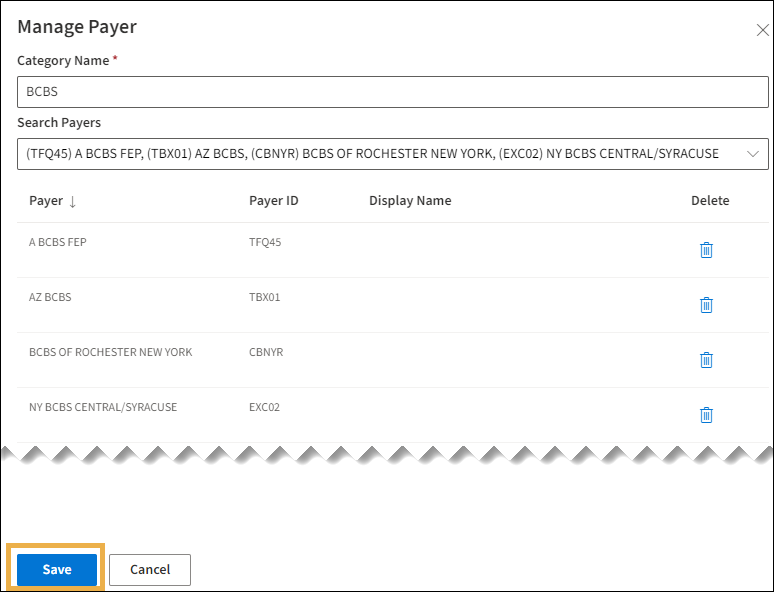
To add Payer Group sub-categories:
-
From Manage Reporting Groups, click Payer 1.
-
Customize the Display Name (Optional).
-
Click Add Payer Category.
-
The Manage Payer Window opens. Enter the Category Name.

-
Enter the payer in Search Payers or click the drop-down arrow to open the payer menu list.

-
Click the checkbox(es) to select the desired payers. Use the scrollbar on the right to view additional payers.
Note: To deselect a payer, click the blue checkbox to remove the check.

-
Click Save or Cancel to exit.
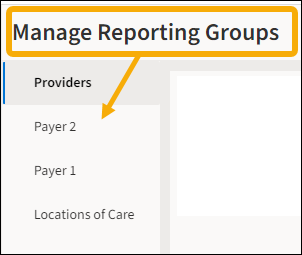
To add Provider sub-category:
- From Manage Reporting Groups, click Providers.
-
Customize the Display Name if desired. Refer to Reporting Group Features for details on customizing.
- Click Add Provider Category.

-
The Manage Provider window opens. Enter the Category Name.

-
Use the Search Providers drop-down menu and click the checkbox(es) for the desired provider(s).
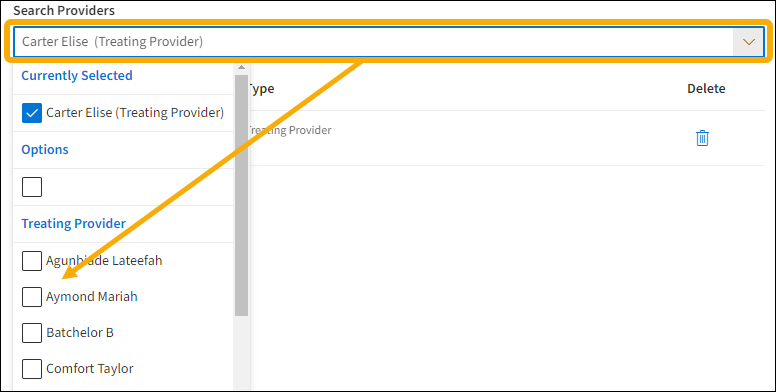
Note: To deselect a provider, click the blue checkbox to remove the check.
- Click Save or Cancel to exit.
Users can edit a sub-category for maintenance of the Reporting Group.
To edit a payer sub-category:
- From Manage Reporting Groups, click the Payer Group containing the sub-category to edit.
- Click the hyperlink for the Category Name.
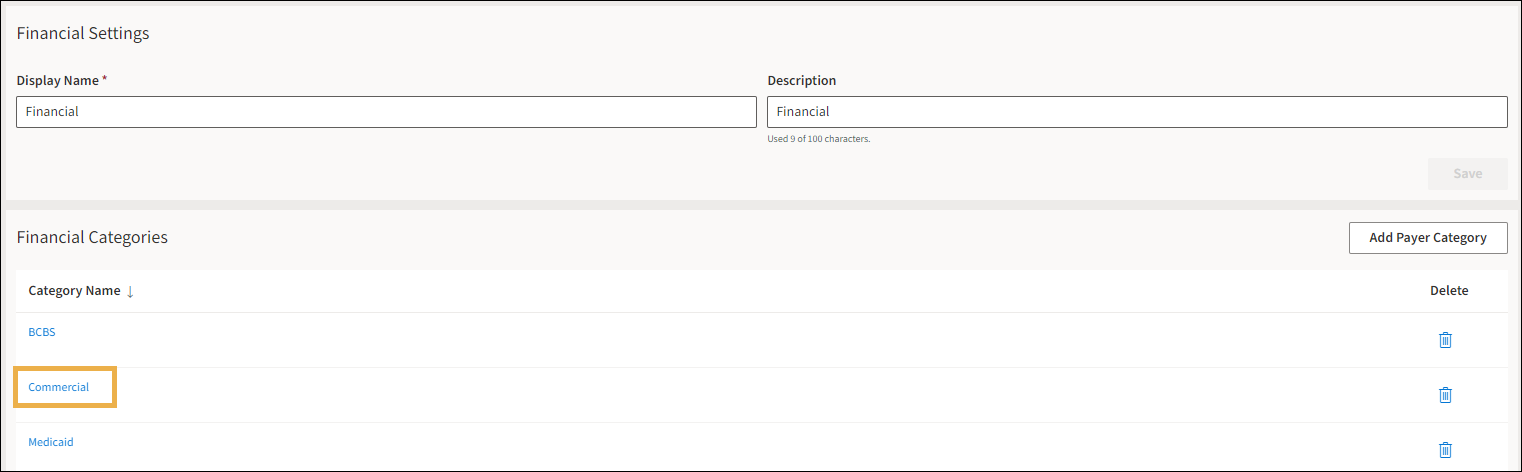
-
Click Save or Cancel to exit.
Users can remove a sub-category from a Reporting Group if needed.
For example, a specific Fee For Service Medicaid payer is no longer a part of your practice’s UDS 9D reporting group and needs to be removed from the list.
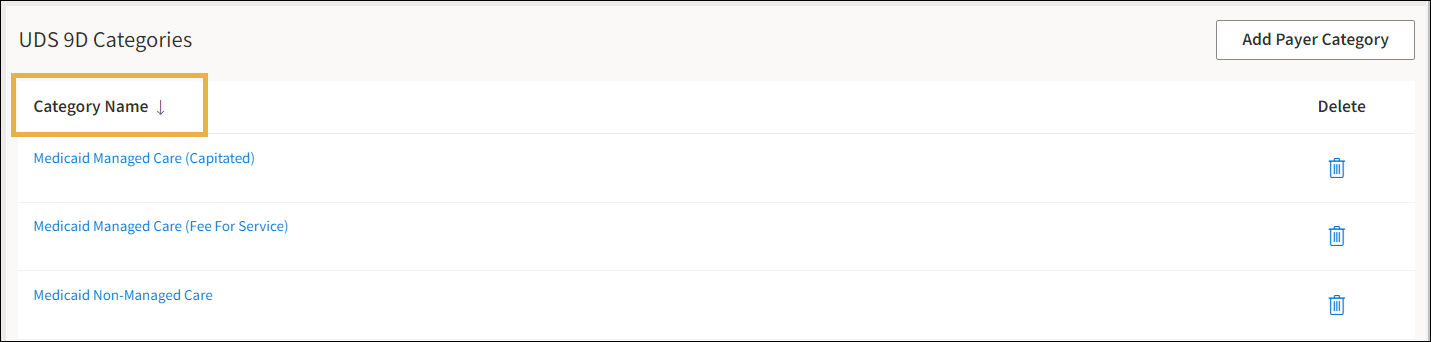
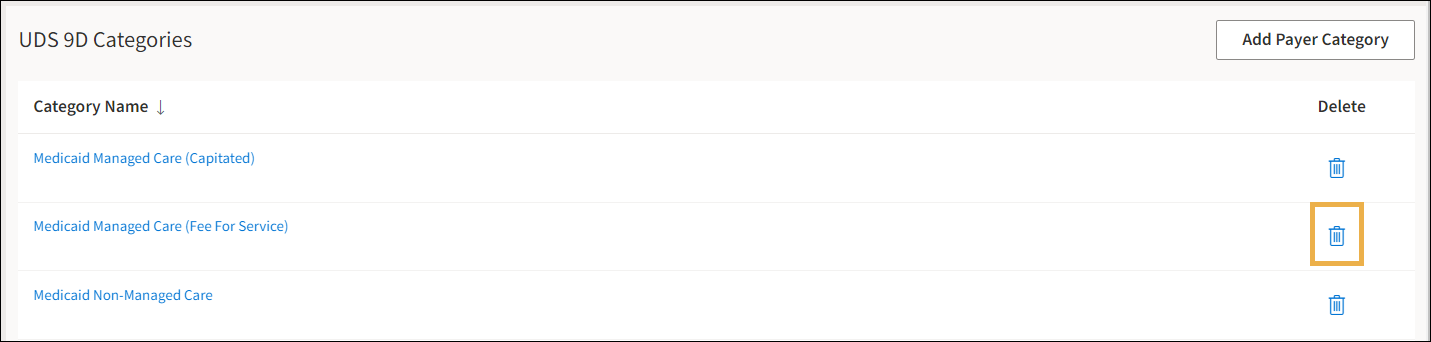
To remove a sub-category from a Reporting Group:
-
From Reporting Groups, click the desired group to edit.
-
From the Categories list, locate the sub-category to remove.
-
Click the trash can icon to delete.
-
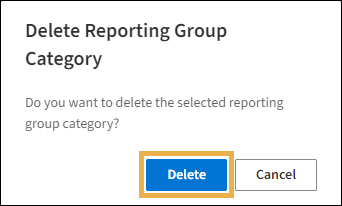
A deletion warning message appears. Click Delete to remove or Cancel to not delete.
Charting Settings
Like the Practice Settings, the Charting section enables users to add and maintain the Procedure Templates and Quick Actions settings.
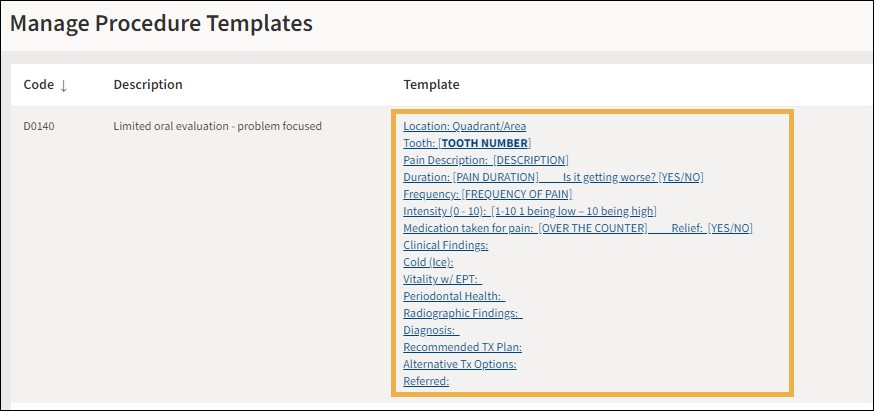
Procedure Templates allows users to add templates to procedures for fast clinical documentation of the procedure process and information. Procedure templates can also explain procedures in greater detail. Important Note: Currently, Procedure Templates are only available at an organizational level.
Creating Procedure Templates
-
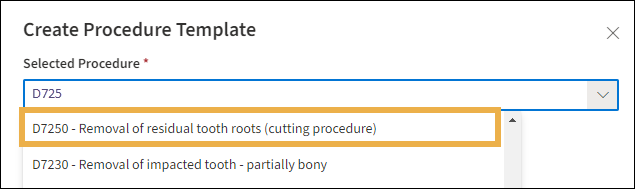
Click Create Template, and the Create Procedure Template window opens.

-
Search for the procedure by code or description in the search textbox.
-
Enter notes about the procedure process, prescriptions, and other information in the text box.
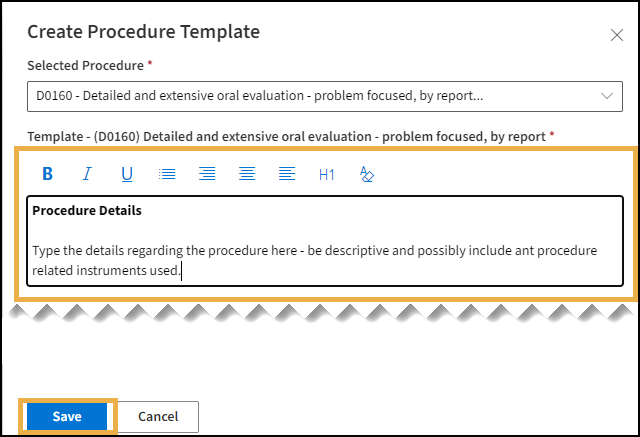
-
Click Save or Cancel to discard.
Edit or Delete Procedure Templates
-
Click the Template hyperlink for the procedure template.
-
The Edit Procedure Template window opens. Edit the procedure template as needed.
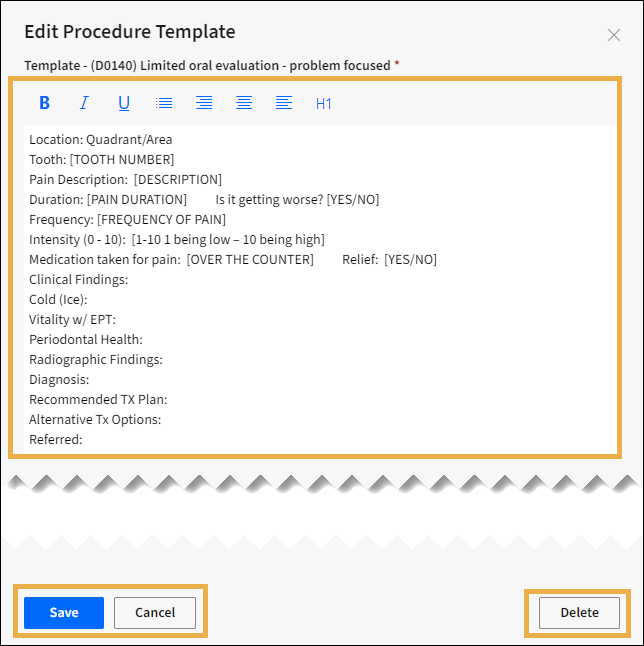
-
Click Save to save, Cancel to discard edits, or Delete to delete the template.
Quick Actions
Quick Actions allow users to create and edit categories used in the Procedures section of Charting.
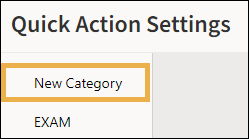
Creating Categories
To create a Quick Actions category:
- Click +New Category from the Quick Action Settings menu bar.

-
A New Category will add to the menu list. Click the New Category selection option.
-
Fill in the Display Name (required), Description, and Default Action for Category fields.
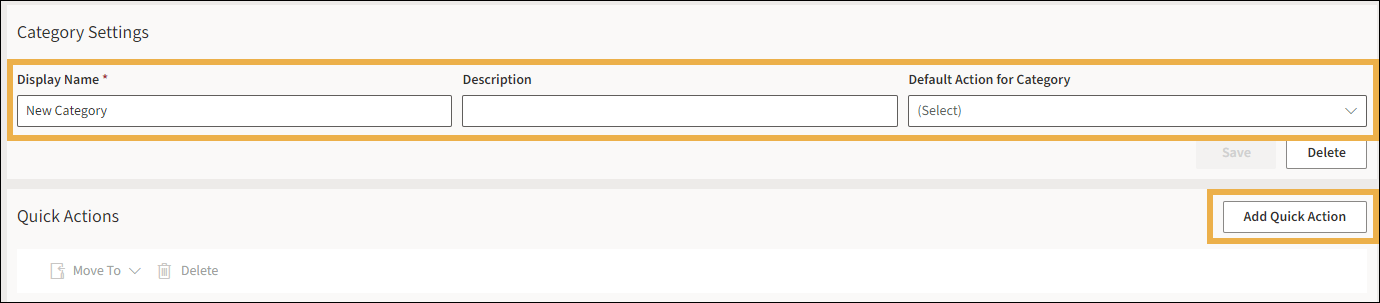
-
Click Add Quick Action, and the Add Quick Action window opens.
- Type the Name (Required).
- In the Type box, use the drop-down menu to select the Procedure.
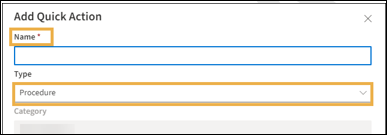
-
In the Add Procedures, use the Search Procedures drop-down menu to select procedures to add.
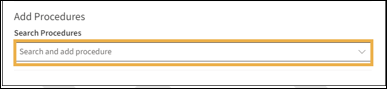
-
Click Save to save or Cancel to close.
Edit Categories
To edit a Quick Actions category:
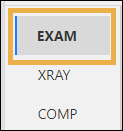
- Click the category from the Quick Actions list.
-
Edit the Category’s Display Name, Description, or Default Action as necessary.

-
Click Save or Delete to delete.
Moving Categories
Users can move a quick action category to another category.
To use Move To:
- Click the category from the Quick Actions list.
-
Click the radio button next to the procedure action item Name.
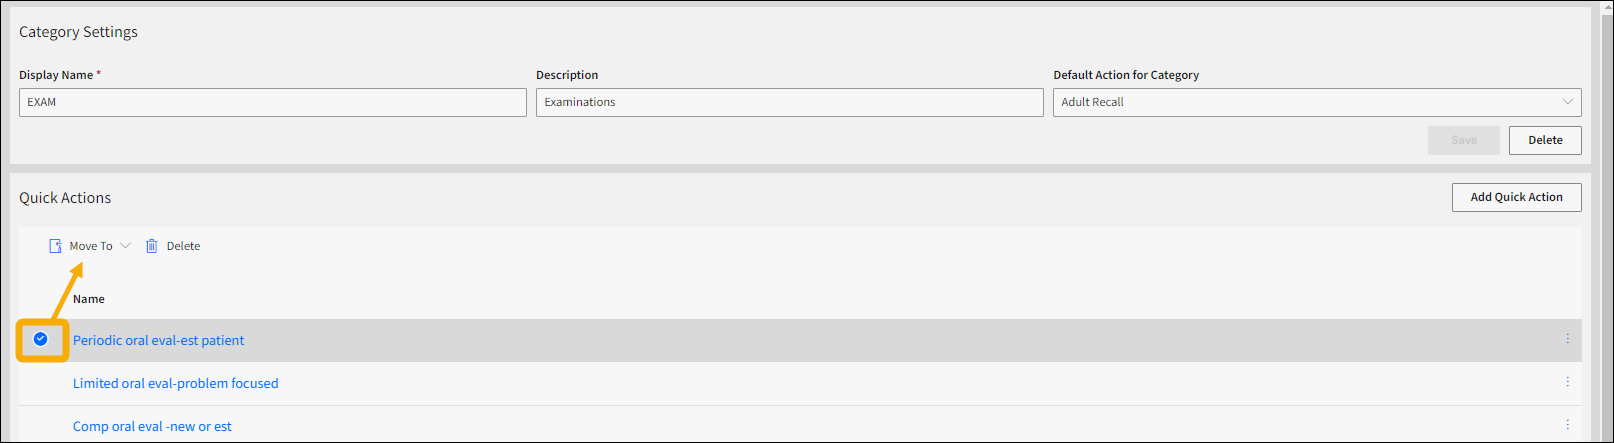
-
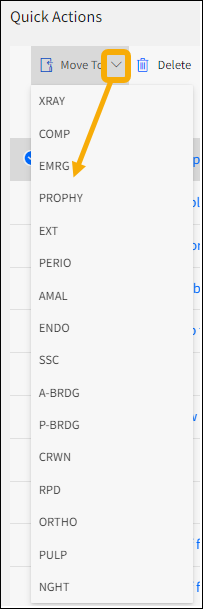
Click the Move To option and use the drop-down menu to select the new category to move to.
-
From the Quick Action Settings menu, click the category the procedure item moved to and verify the move.
Delete Quick Action Items
Users can delete a procedure action item from a Quick Action Category Setting. To delete:
-
Click the category from the Quick Actions list.
-
Click the radio button next to the action item Name.
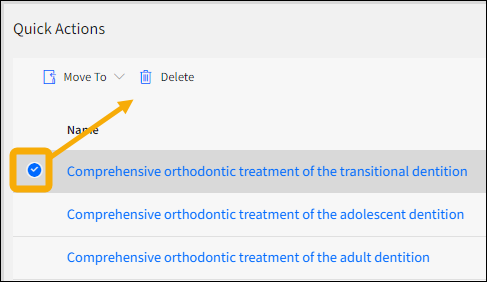
-
Click Delete, and the item removes from the list.
Logout
Click Logout in the User Profile drop-down menu to log out of athenaOne Dental.

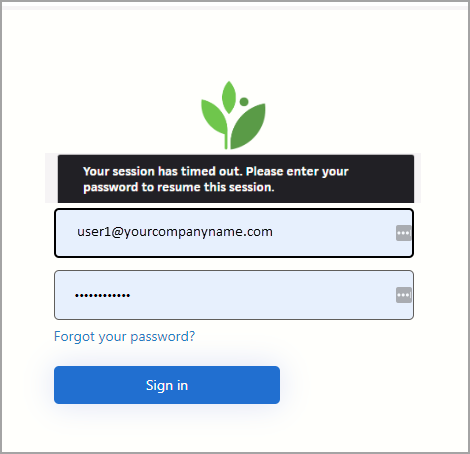
Auto Logout
athenaOne® Dental contains an automatic logout feature. Users who are inactive for thirty (30) minutes will be automatically logged out.
A pop-up warning message appears for the user after twenty-nine (29) minutes of inactivity. The user has sixty (60) seconds to click the Keep me logged in button or Log Me Out button.
If a user misses the warning notification window, the following message appears on their login screen:
Your session has timed out. Please enter your password to resume this session.
Role-Based Access
Users receive different access and security permissions from their administrator based on their role in the application. If you need additional access, contact your practice’s Senior System Applications Administrator. The separate roles have the following landing pages:
-
Junior Clinical: often assigned to Dental Assistants.
- Senior Clinical: often assigned to Dentists and Hygienists.
- Resident Provider: often assigned to treating providers that require an Attending Provider when executing specific charting tasks. Important Note: Resident providers cannot attest clinical notes.
-
Senior Admin: often used for Office Managers.
- Junior Admin: often assigned to Patient Service Representatives, e.g., front desk or call center staff.
- Billing: often assigned to the revenue cycle team.
|
|
Clinical |
Administrative |
|
|||
|
Access |
Junior Clinical |
Senior Clinical |
Resident Provider |
Junior Administrative |
Senior Administrative |
Billing |
|
Admin Huddle |
|
|
|
✓ |
✓ |
✓ |
|
Chart Settings |
|
|
|
|
✓ |
|
|
Clinical Huddle |
✓ |
✓ |
✓ |
|
|
|
|
ePrescribe |
|
✓ |
✓ |
|
|
|
|
Ledger |
|
✓ |
✓ |
✓ |
✓ |
✓ |
|
Odontogram |
✓ |
✓ |
✓ |
|
|
|
|
Patient Overview |
✓ |
✓ |
✓ |
✓ |
|
|
|
Perio |
✓ |
✓ |
✓ |
|
|
|
|
Practice Settings |
|
|
|
✓ |
✓ |
|
|
Reporting |
|
|
|
✓ |
✓ |
✓ |
|
Scheduling |
|
|
|
✓ |
✓ |
|
|
Treatment Plan |
✓ |
✓ |
✓ |
|
✓ |
✓ |
|
Configure Imaging |
|
|
|
|
✓ |
|
Senior System Applications Administrator Role
The Senior System Applications Administrator Role (SSAA) within athenaOne Membership allows practices to manage users and subscriptions. The SSAA maintains the user roles and controls the permissions given to individual users. The practice’s SSAA can add, edit, and deactivate users.
Note: Customer Support creates the practice's Senior System Applications Administrator user(s) and will email the membership link and initial login information. Once the access information is received, the SSAA user can manage the dental users for the practice.
The SSAA will use the Role-Based dental application guidelines to determine an individual’s necessary access
and permission level. Refer to Role-Based Access and Bento Box for more details.
To access user management from Membership:
-
Log in to athenaOne Membership using your email address and password.
-
Important Note: New SSAA users will use the link provided by Customer Support, their email address, and the one-time use/default password to access. Then, the SSAA user will reset the password to a new one and will be redirected to the login screen to log in with their newly set password.
-
-
The Home Page opens containing navigation options for Manage Users and Subscriptions.
Refer to Application Features: Bento Box for more details on accessing Membership from athenaOne Dental.